
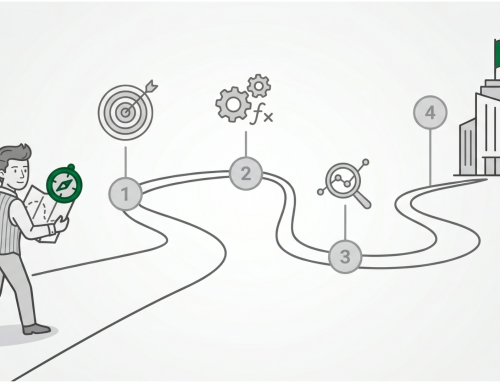
We use this Google Ads checklist every time we set up a new campaign for a client. If you’re about to launch a new Google Ads PPC search campaign, there are 9 key settings you’ll want to double-check to ensure you’re set up for success:
- Initial Keyword Match Type
- Negative Keywords
- Initial CPC Bid
- Budget
- Ads
- Locations
- Networks
- Devices
- Conversion Tracking
1. Initial Keyword Match Type
A very common mistake that almost all new PPC advertisers make is to set the keyword match type to Broad without a strategy behind it. Broad match will give you the most traffic, but in the early stages of your test campaign you don’t want to risk showing your ad to irrelevant searches.
For everyone who is not familiar with keyword match types, here’s a quick primer. There are three match types: Broad, Phrase, and Exact.
The match type of a keyword tells Google which searches should trigger your ad. If all of your keywords are Exact match, then you’re telling Google to only show your ad when the exact keyword (or a very close variation) is typed into Google.
Phrase match keywords will trigger ads when the meaning of your keyword is part of the search. For example, if your Phrase match keyword is “office space,” then your ad could display for “new york office space” and “office space in nyc.” However, your ad would not display for completely unrelated searches.
Broad match keywords will trigger your ad for the exact match, the phrase match, and also for any other search that Google has determined is related to your keyword. So you’ll get the most traffic with Broad match, but you risk showing your ad to irrelevant traffic.
We recommend starting with Phrase match because it gives you a good balance of targeting and reach. If you’re using automated bidding strategies like Target CPA or Maximize Conversions, Broad match can also work well because the algorithm learns which searches convert. But if you’re using manual bidding or just getting started, stick with Phrase match and make sure you complete step 2 below.
2. Negative Keywords
Negative keywords are critical if you’re going to use Phrase or Broad match keywords.
If you add a negative keyword to your campaign or ad groups, then Google will never show your ad when the negative keyword is present in the search phrase. For example, if you sell hard drives that only fit in desktop computers and you’re advertising on the Phrase match keyword “hard drives,” then you will want to add “laptop” as a negative keyword. Otherwise, your ad would display for search phrases like “laptop hard drives,” which is not going to be relevant for your business.
A useful starting point for finding negative keywords is Google’s “Related searches” at the bottom of the search results page. Simply search for one of your keyword phrases and then copy any related searches that are not relevant to your product or service.
You should also review the Search Terms report in your Google Ads account after your campaign has been running for a few days. This report shows you exactly what people searched for when they clicked your ad, and you’ll almost always find irrelevant terms to add as negatives. We recommend checking this report at least weekly during the first month of a new campaign.
3. Initial CPC Bid
We get a lot of questions from clients about what value to use for the initial cost per click (CPC) bid.
The best place to start is to use Google Keyword Planner to get the estimated CPC for each keyword. The estimated CPC is typically the most you would have to pay to be in the top position with a good ad. However, if your ad can get a better click-through rate (CTR) compared to your competition, then you should be able to get a much lower CPC over time.
There are many factors that determine your exact CPC, which is beyond the scope of this article. The important thing to remember is that your initial CPC bid is not what you’re actually going to pay for each click, and over time you should be able to drive down the cost with good ad copy and a strong Quality Score.
We recommend you start with an initial CPC bid close to the estimated CPC Google gives you in Keyword Planner. This will ensure your ad gets good exposure in the top positions so you’ll have the best opportunity to get a high CTR.
If your ad copy is good enough to get you a high CTR, then you’ll be able to lower your bids over time without Google dropping your ad position. There are other factors, but this is the basic strategy we recommend if you’re just starting out.
Keep in mind that if you’re using automated bidding strategies like Target CPA, Google will set your bids automatically based on your conversion goals. In that case, your initial CPC bid matters less because the algorithm adjusts in real time.
4. Budget
Once you have your keyword bids set, it’s time to set your daily campaign budget.
There are two factors that determine your budget: how much money you have to test, and how many keywords you want to test.
For your initial test, we recommend you run your ads for at least 10 days so you get data for each day of the week. We say 10 rather than 7 days because it typically takes a few days for your campaign to ramp up.
So if your budget is $500 per month, then you should not spend more than $50 per day. Then if you max out your budget, you would pause your campaign, make any adjustments based on the test data, and then resume the following month.
As long as your delivery method is set to “Standard,” Google will spread out your ad impressions over the entire day. This will ensure your ads don’t stop displaying mid-day because you hit your budget.
If you have a lot of keywords that you want to test, then you’re either going to have to spend more time testing or spend more money each month, because your cost is going to be spread out over so many keywords.
We like to get at least 100 to 200 clicks on a keyword before declaring it a winner or a loser that we need to pause or delete. That means we try to get at least 100 clicks for every keyword in the ad campaign. If you have a lot of keywords, we suggest you pare down your list for the initial test and then add more keywords later once your campaign is up and running. For more on how to think about your initial test budget, read our guide on calculating your Google Ads test budget.
The formula to estimate how much it’s going to cost to get 100 clicks per keyword and how long it’s going to take is fairly straightforward.
Cost = 100 clicks × estimated CPC.
Number of months to test = 100 / (estimated monthly search volume × estimated ad click-through rate)
Here’s a quick example for the Phrase match keyword “office space”:
Estimated search volume = 368,000. Estimated CPC = $6.97. Estimated ad CTR = 1.5% (we’re estimating that our ads will be clicked 15 times out of 1,000 impressions, which is a reasonable estimate if you have no other data to use).
Therefore, the estimated cost is $697 to test this keyword. Plus, we could get 100 clicks in just one day if our ad CTR is 1.5% and Google displays our ad for all of the available impressions.
From that simple formula you can estimate the cost and time frame to test each keyword. Then you can adjust your daily budget accordingly and add or remove keywords from your initial test list.
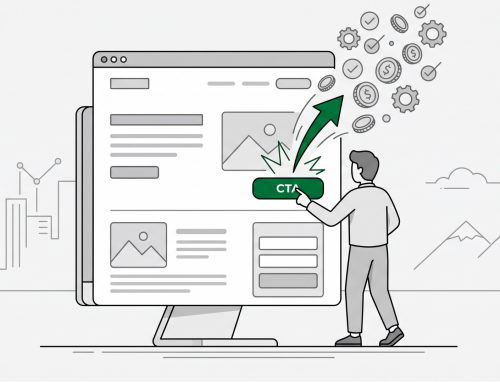
5. Ads
Google Ads now uses Responsive Search Ads (RSAs) as the default ad format. With RSAs, you provide up to 15 headlines and 4 descriptions, and Google automatically tests different combinations to find the best performers. This replaces the old approach of creating multiple separate text ads.
Write at least 8 to 10 distinct headlines that highlight different benefits, offers, and angles. Include your target keyword in at least 2 or 3 of them. For ideas on writing effective headlines, see our Google Ads headline templates.
The most important thing to remember with your ad copy is The Congruence Principle: your keyword, your ad, and your landing page all need to tell the same story. If someone searches “emergency plumber in Hartford,” your ad should mention emergency plumbing in Hartford, and the landing page they land on should be about emergency plumbing, not your general homepage.
In addition to click-through rate, you’ll want to measure conversion rates (discussed in step 9 below) to determine which ad variations perform best. It’s possible to have a headline combination that generates a high CTR but doesn’t convert as well, so always measure both.
6. Locations
Make sure you’re targeting the correct locations.
If your business only serves local customers, you’ll want to focus your ads on your geographical area. For example, if you are a dentist in Hartford, you’ll only want to show ads to people in and around the Hartford area.
If you serve a national or international audience, we highly recommend you start with one campaign targeting one country. Then once everything is working, create a new campaign to test another country. This will allow you to tailor your ads for each market and easily compare performance separately.
One setting to watch: change the location option from “Presence or interest” to “Presence” only. The default setting shows your ads to people who are merely interested in your area, not just people who are physically there. For most local businesses, you only want to pay for clicks from people in your service area.
7. Networks
Select Search and uncheck the Display Network. By default, Google tries to opt you into the Display Network, but we only want to target Search traffic for the initial test. If all goes well, then you can create a new campaign that targets only the Display Network separately. Keeping them in separate campaigns gives you much more control over budgets and performance analysis.
8. Devices
In 2026, your website should be mobile-optimized. If it isn’t, that’s a bigger problem than your Google Ads settings. Assuming your site works well on mobile, target all devices by default and let your campaign data tell you where to adjust.
After a few weeks of data, review performance by device in the Devices report. If mobile is underperforming significantly compared to desktop, you can add a negative bid adjustment for mobile rather than excluding it entirely. The same applies to tablets, though in practice they tend to perform similarly to desktop.
9. Conversion Tracking
Last but certainly not least is conversion tracking. If you fail to set up conversion tracking, there is no way you’ll be able to measure the effectiveness of each keyword in your campaign. You’ll be flying completely blind.
A conversion is any action on your site that you consider valuable. Some examples are online sales, quote requests, scheduling a demo, signing up for a free trial, phone calls, and contact form submissions.
To set up conversion tracking, navigate to the Goals section in your Google Ads account and follow the setup instructions for each type of conversion you want to track. Your webmaster or developer may need to add conversion tracking code to your website.
For phone call tracking specifically, read our guide on how to track phone calls from Google Ads.
We call Tracking the Foundation of The Growth Formula because without it, every decision you make about your marketing is a guess. Your Google Ads campaign is no exception.
Ready to Launch?
For a broader overview of how to approach your first campaign strategically, read our guide on how to set up a Google Ads campaign in 7 steps.
Need Help with Google Ads?
If you need help setting up or optimizing your Google Ads campaigns, we can help. Request a free quote for Google Ads management, and we’ll review your goals and recommend the right approach.
